ติดตั้งผ่าน Package Manager
System --> Administration --> Synaptic Package Manager
Search = dnsmasq-base
คลิกขวาที่ dnsmasq-base เลือก Mark for installation
Apply
ติดตั้งผ่านบรรทัดคำสั่ง Command line
Applications --> Accessories --> Terminal
sudo apt-get install dnsmasq-base
2. Network-manager
คลิกขวา --> Edit Connections...
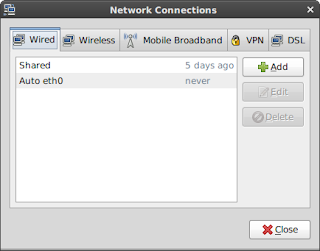
1. wireless ต่อ internet แล้วให้ lan แชร์ให้เครื่องอื่น
แท็บ Wireless
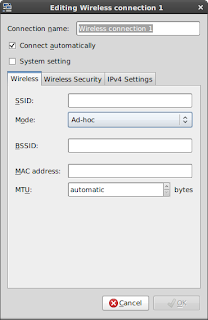
Add --> Connection name = ชื่ออะไรก็ได้
Wireless --> SSID: --> Mode = Ad-hoc
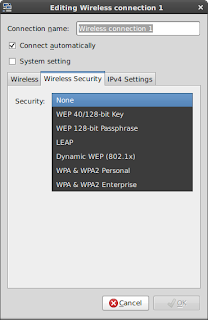
Wireless Security --> อะไรก็ได้ ในที่นี้เลือกเป็น none
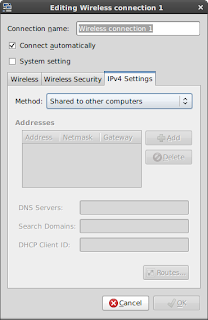
IPv4 Settings --> Shared to other computers
2. Lan ต่อ Internet แล้วให้ wireless แชร์ให้เครื่องอื่น
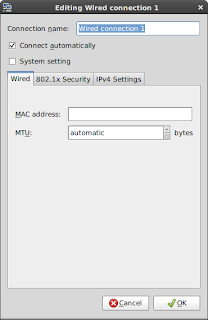
แท็บ Wired
Add --> Connection name: = ชื่ออะไรก็ได้
Wired = none
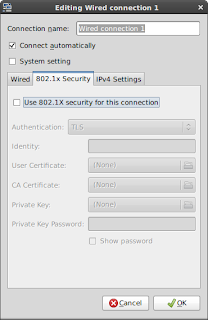
802.1x Security = อะไรก็ได้ ในที่นี้เลือกที่จะปล่อยไว้เฉยๆ
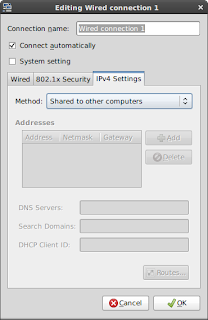
IPv4 Settings --> Shared to other computers
เสร็จเรียบร้อยครับ
1 ความคิดเห็น:
สุดยอดเลยครับ ผมอยากใช้ command line ได้
แสดงความคิดเห็น