17 มิถุนายน 2552

HSF Modem For Intrepid

ที่มา

https://help.ubuntu.com/community/DialupModemHowto/Conexant


1. ติดตั้งแพ็กเกจที่จำเป็น

sudo apt-get install build-essential cdbs fakeroot dh-make debhelper debconf libstdc++5 dkms


2. Download driver

https://help.ubuntu.com/community/DialupModemHowto/Conexant?action=AttachFile&do=view&target=hsfmodem-7.80.02.03full-dellhybrid.tar.bz2


3. Copy driver ไปไว้ที่ /usr/local/src

sudo cp hsfmodem-7.80.02.03full-dellhybrid.tar.bz2 /usr/local/src/


4. แตกซิปออก

sudo tar -jxvf hsfmodem-7.80.02.03full-dellhybrid.tar.bz2


5. เข้าไปในไดเรคทอรี่ของไดร์เวอร์

cd /usr/local/src/hsfmodem-7.80.02.03full/


6. ติดตั้งไดร์เวอร์

sudo make install


7. ตั้งค่าไดร์เวอร์

sudo /usr/sbin/hsfconfig


8. reboot

สุดท้าย

ต่อเน็ตโดยใช้ gnome-ppp หรือ wvdial ตามสะดวกครับ
แชร์อินเตอร์เน็ตง่ายๆ ด้วย Network-manager 0.7 (ubuntu 8.04 ขึ้นไป)

1. ติดตั้งแพ็กเกจ dnsmasq-base

ติดตั้งผ่าน Package Manager

System --> Administration --> Synaptic Package Manager

Search = dnsmasq-base
คลิกขวาที่ dnsmasq-base เลือก Mark for installation
Apply

ติดตั้งผ่านบรรทัดคำสั่ง Command line

Applications --> Accessories --> Terminal

sudo apt-get install dnsmasq-base

2. Network-manager
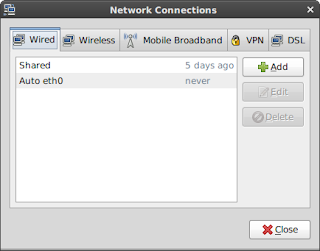
คลิกขวา --> Edit Connections...

1. wireless ต่อ internet แล้วให้ lan แชร์ให้เครื่องอื่น

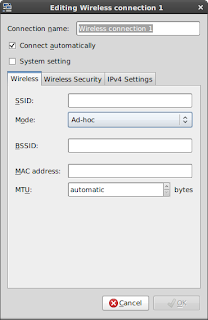
แท็บ Wireless

Add --> Connection name = ชื่ออะไรก็ได้
Wireless --> SSID: --> Mode = Ad-hoc

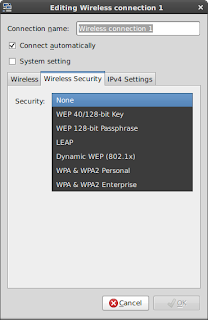
Wireless Security --> อะไรก็ได้ ในที่นี้เลือกเป็น none

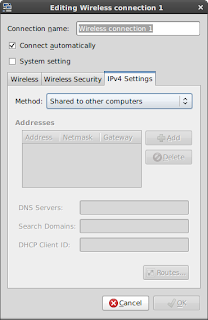
IPv4 Settings --> Shared to other computers


2. Lan ต่อ Internet แล้วให้ wireless แชร์ให้เครื่องอื่น

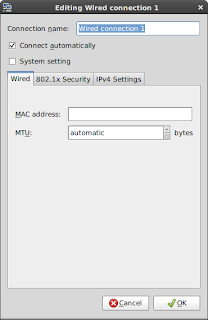
แท็บ Wired
Add --> Connection name: = ชื่ออะไรก็ได้
Wired = none

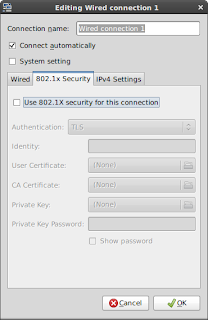
802.1x Security = อะไรก็ได้ ในที่นี้เลือกที่จะปล่อยไว้เฉยๆ

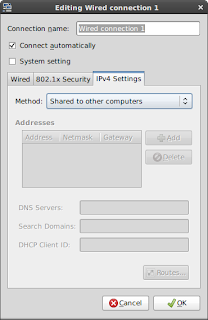
IPv4 Settings --> Shared to other computers


เสร็จเรียบร้อยครับ